
Specify the decision
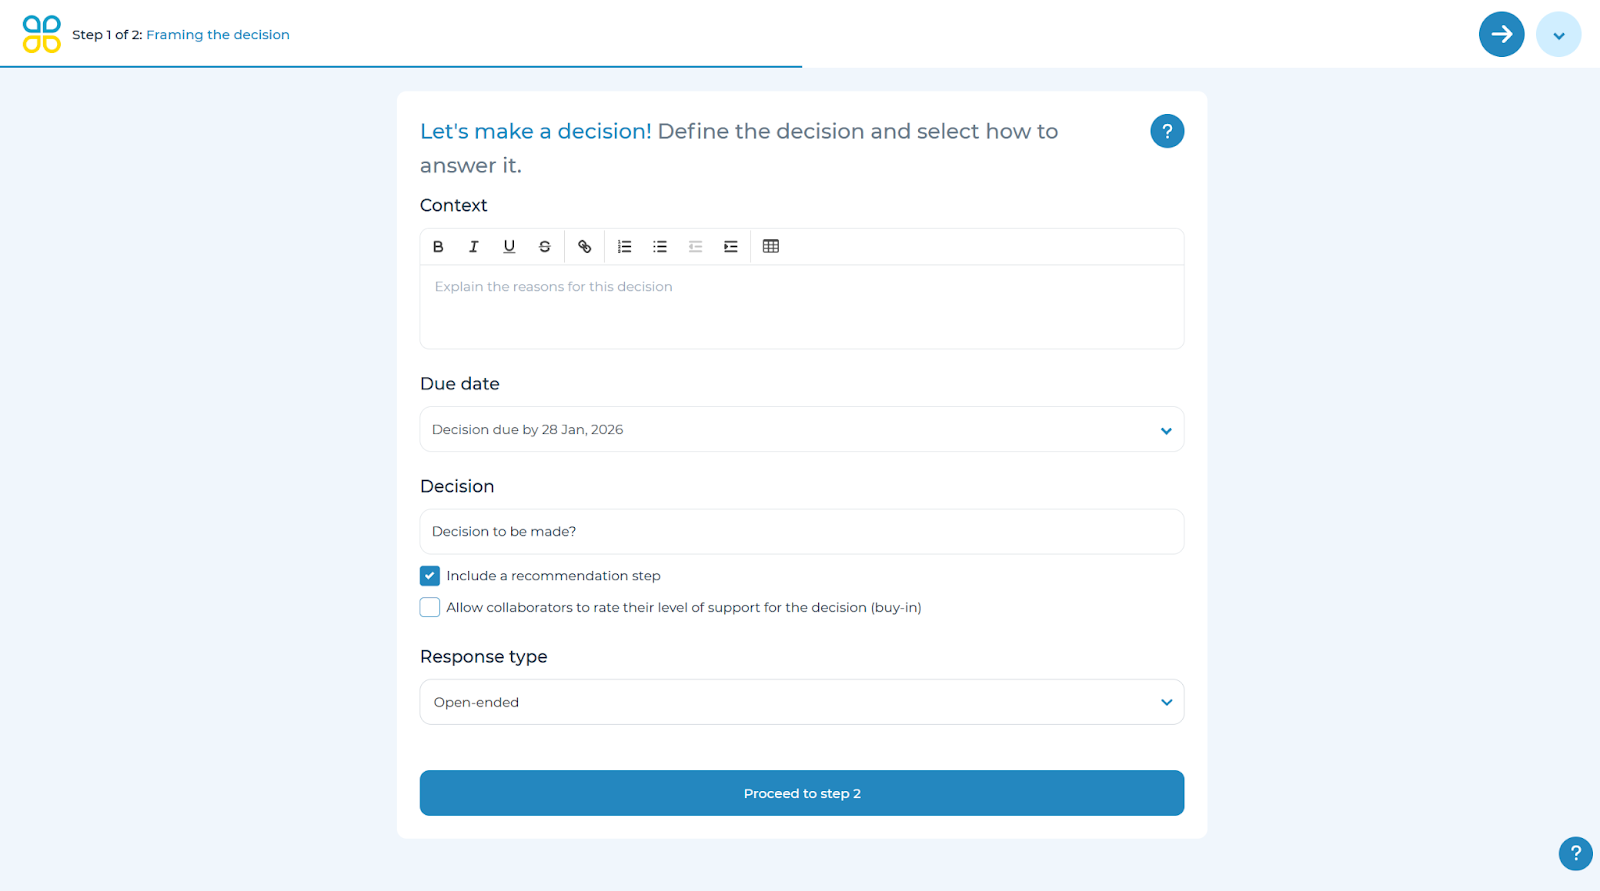
Upon starting the creation process, you will be presented with a decision creation menu. If you are creating a decision from a template, some of the fields may already be prepopulated. The parts of this menu are:
Context:
Use the Context section to explain the background and purpose of the decision. Describe the current situation, key factors, risks, or complications that should be considered.
Due date:
Set a target date for completing the decision. An automated reminder will be sent based on this date to help keep the process on track.
Decision:
The decision title should clearly frame the problem, possible choices, and what needs to be decided. For clarity and focus, phrase the title as a question. Starting with “How should we…” or “What should we do about…” helps encourage broader thinking.
If your process includes making a recommendation before the final decision, select “Include a recommendation step.”
Response type:
Choose how the decision will be answered.
Open-ended – Allows a free-form text response
Pick top choice – Select a single option
Pick all that apply – Choose multiple options
Rank a list – Order options from most to least preferred
To compare options more rigorously, select “Rate and compare choices per driver.” This enables choice evaluation based on decision drivers, which can be weighted to generate an overall ranking later.
Once done, proceed to the next step.
Decision tree creation
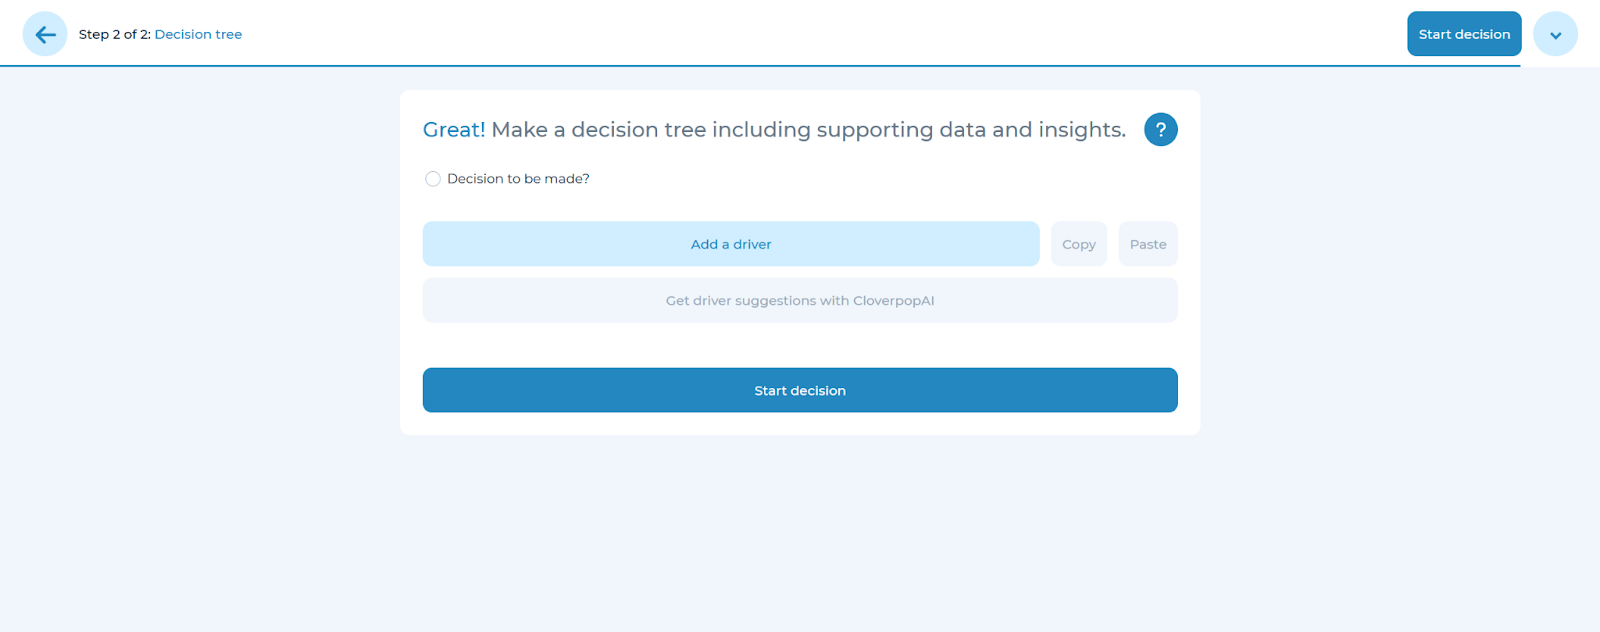
Add a driver to the decision by clicking the ‘Add a driver’ button and entering details or hovering the cursor over the spot in the decision tree where you want to add a driver and clicking the ‘+’ icon.
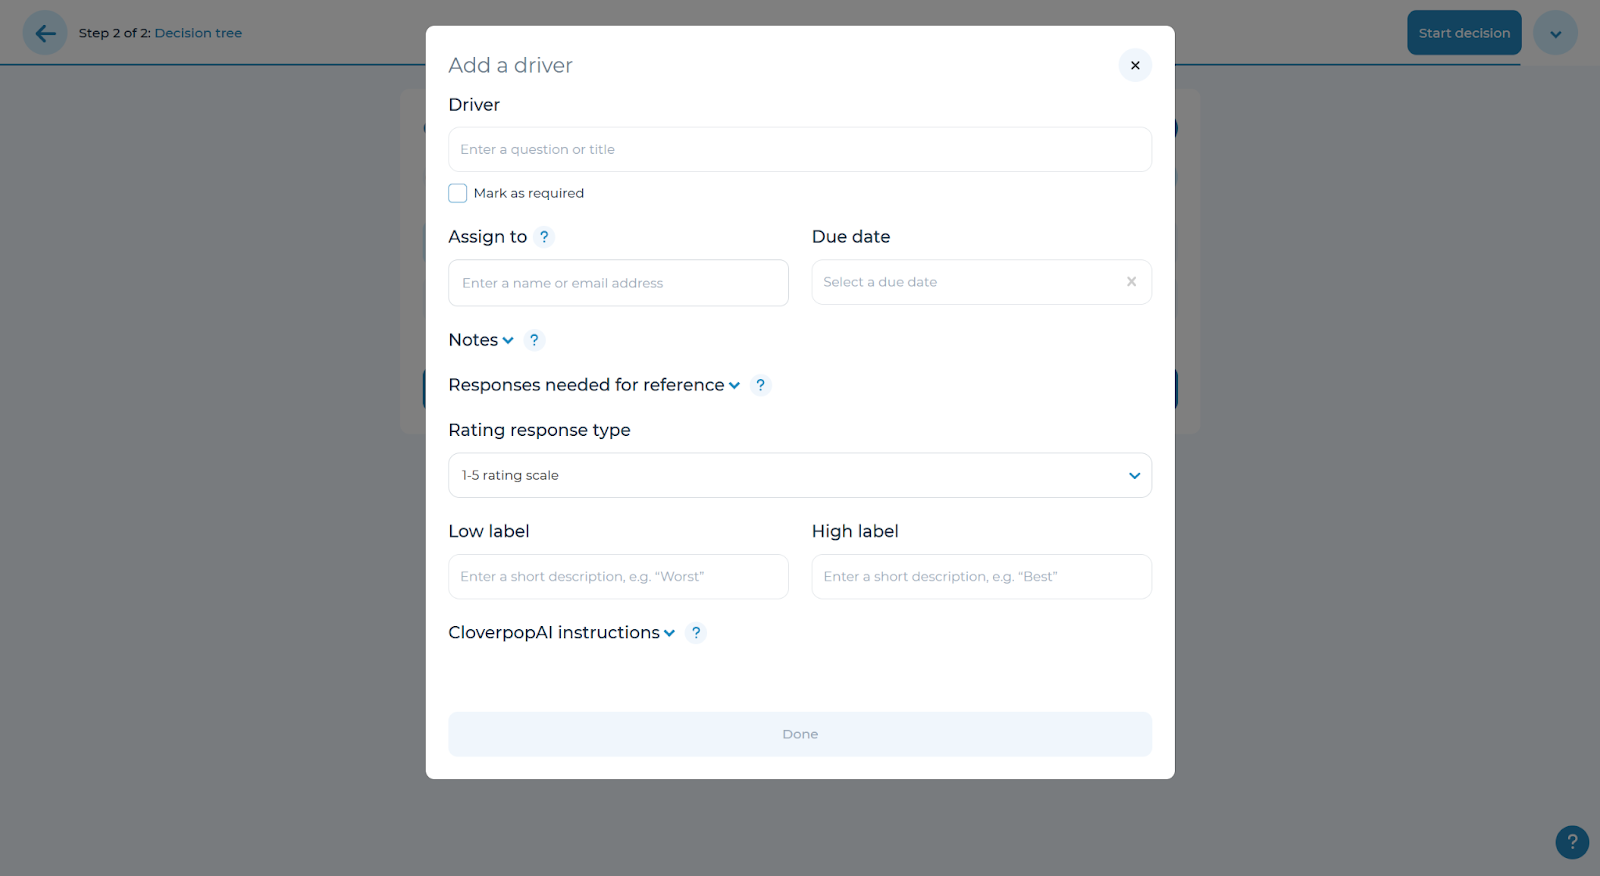
Enter a question or title for the driver, the name of the person to assign the driver to, the due date by which the assignees should complete their responses.
The ‘Notes’ section should contain instructions or any relevant information to the assignee, while the ‘Responses needed for reference’ section should contain the titles of drivers the assignee would need to reference in order to complete their response.
‘Low Label’ and ‘High Label’ are the labels for the scale on which the assignees will rate their response by, e.g their confidence level in their answer. For more information about ratings, see Setting up ratings & weights.
‘CloverpopAI Instructions’ is an optional section used for any additional instructions for CloverpopAI to consider when generating a suggestion for how to respond to the driver.
Editing the Decision tree
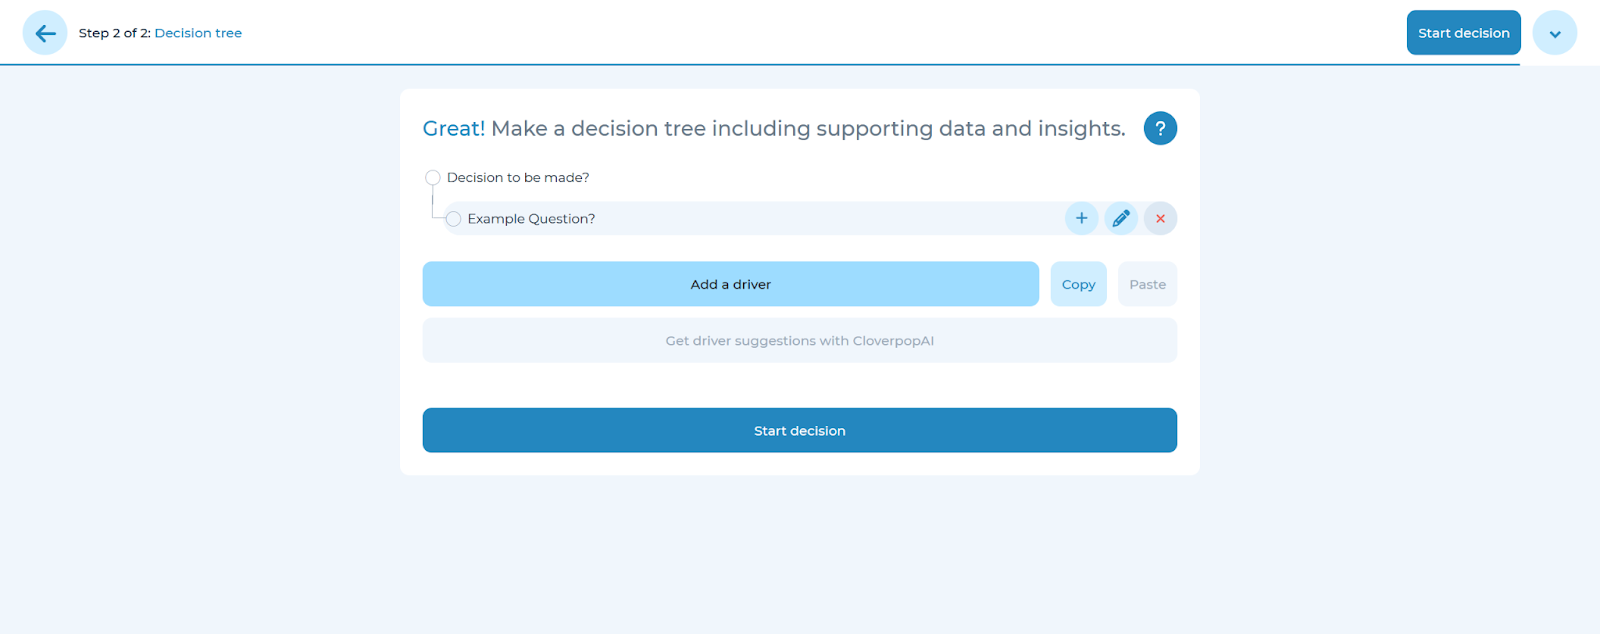
Once a driver is created, you can add sub-drivers to each driver by clicking the ‘+’ button when hovering over a specific driver, or add more top-level drivers.
Once at least two top level drivers have been added, you can click the ‘Get driver suggestions with CloverpopAI’ button to receive suggestions for additional drivers.
Move / Delete a driver
You can change the order and level of drivers by dragging and dropping a specific driver or group of drivers.
Delete drivers by hovering the cursor over them and clicking the ‘X’ button.
Copy / Paste a driver
Copy / paste a driver by clicking the driver you want to copy to highlight it, then clicking ‘Copy’. Select the location you want the driver to be pasted and click ‘Paste’. All of the content, including assignees, notes, due dates, and all sub-drivers (if relevant) will be copied.
You can only copy / paste drivers within a specific tree. Alternatively, you can copy an existing decision or copy a template.
The decision question, along with drivers and their contents can be added, deleted, or edited even after the decision has been created.
Once you have sufficiently built out your decision tree, select ‘Start Decision’ in the top right-hand corner to create the decision after which the decision will appear in the Decision Center.