
If you are the decision manager, you can continue editing the decision tree throughout the decision-making process.
Edit decision tree
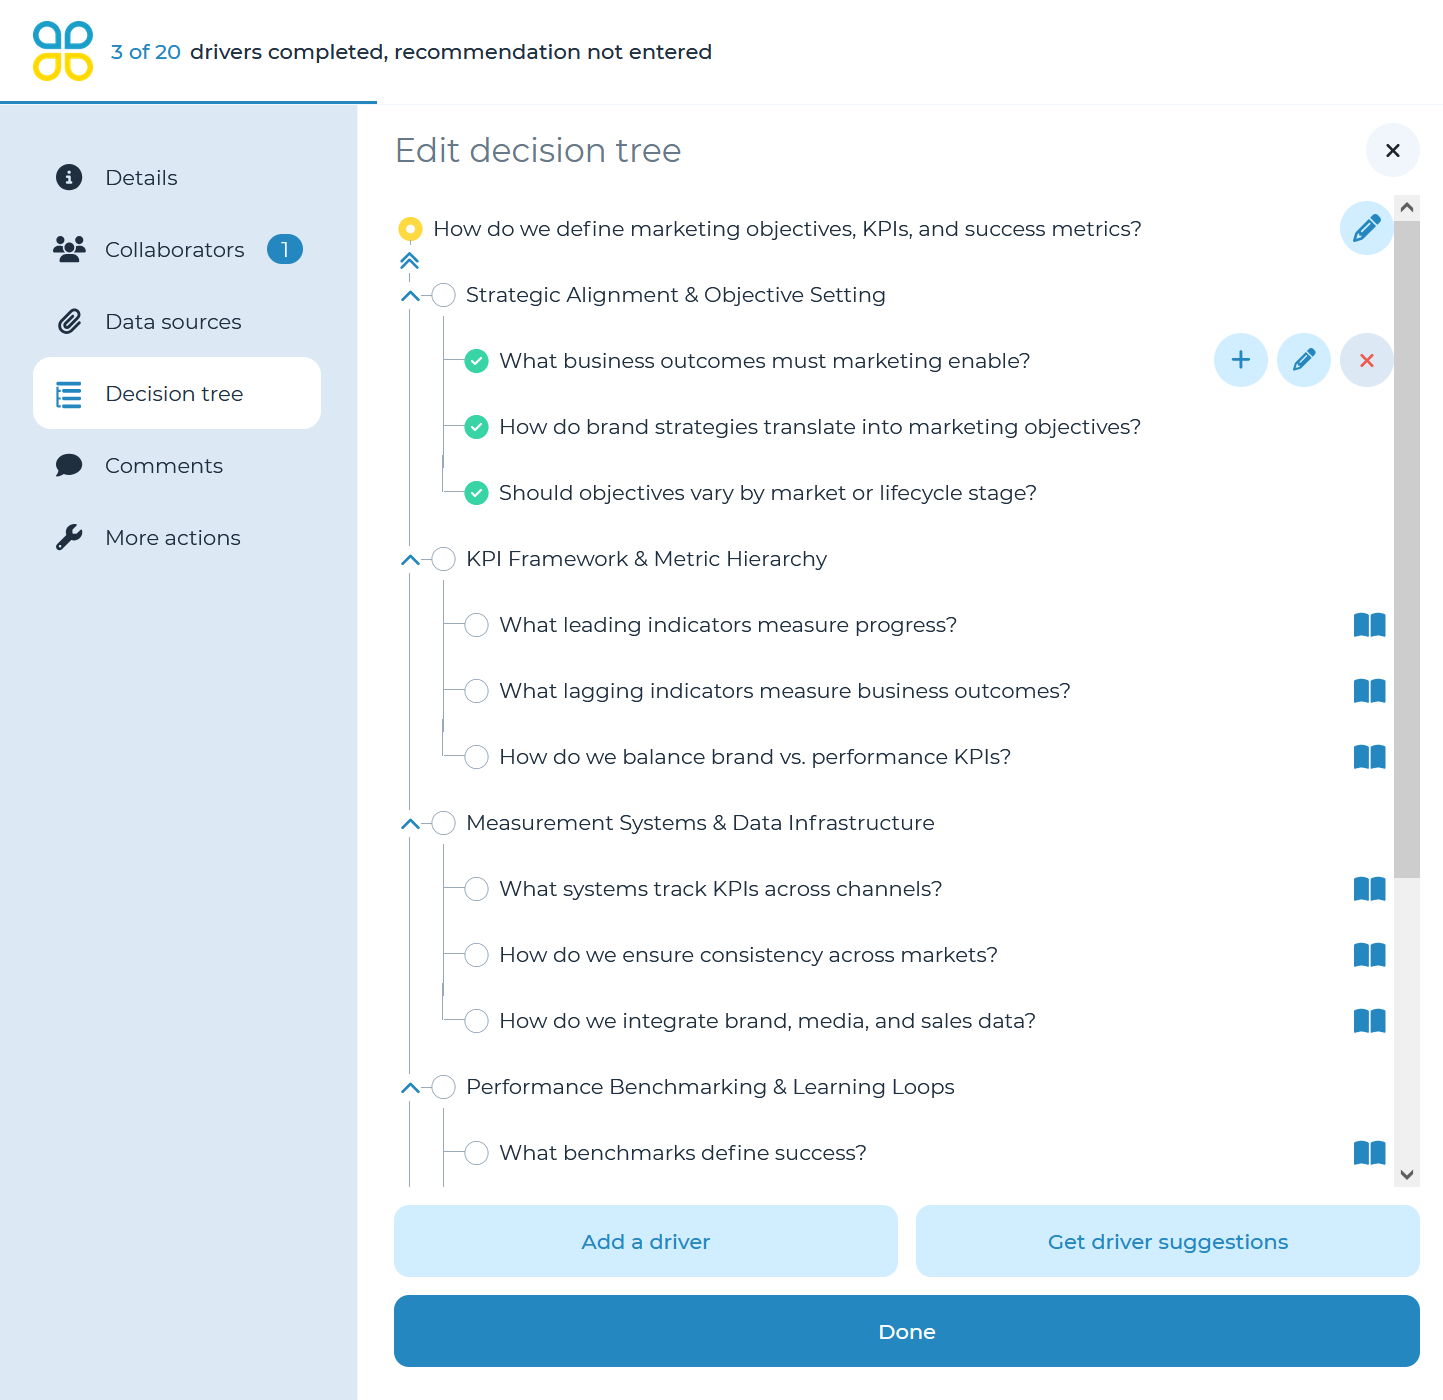
To edit the tree, select ‘Decision tree’ on the left to open a panel with all your drivers and select the ‘Pencil’ at the top to edit the tree.
You can add, delete, edit and move and copy/paste drivers within the structure of the tree.
- Add a driver: Click the ‘Add a driver’ button and enter the necessary details. You can also hover the cursor over the spot in the decision tree where you want to add a driver and click the ‘+’ icon which appears.
- Add a subdriver: Click on the title of a driver in the tree to highlight it. A button at the bottom of the panel will appear to add a subdriver under the specific driver you have highlighted.
- Move driver: You can change the order and level of drivers by dragging and dropping a specific driver (which will move its subdrivers as well).
- Delete driver: Delete drivers by hovering the cursor over them and clicking the ‘X’ button.
- Duplicate Driver: Click on a single driver to highlight it, then open the ‘More options’ dropdown at the bottom of the panel and select ‘Duplicate driver’. You can do this to multiple drivers at once by clicking on the necessary drivers while holding the shift key. Then click on the ‘Duplicate drivers’ button at the bottom of the panel.
You can also generate more drivers using the AI assistant driver suggestion feature, once at least two top level drivers have been added. To learn more about this feature, refer to the CloverpopAI section of the user manual.
Assign drivers
To assign drivers to people in your organization select the driver you wish to assign and click on the ‘person’ symbol. In the popup, you can then enter the assignee’s name or email, set a due date for the driver and add any relevant notes about the driver.’
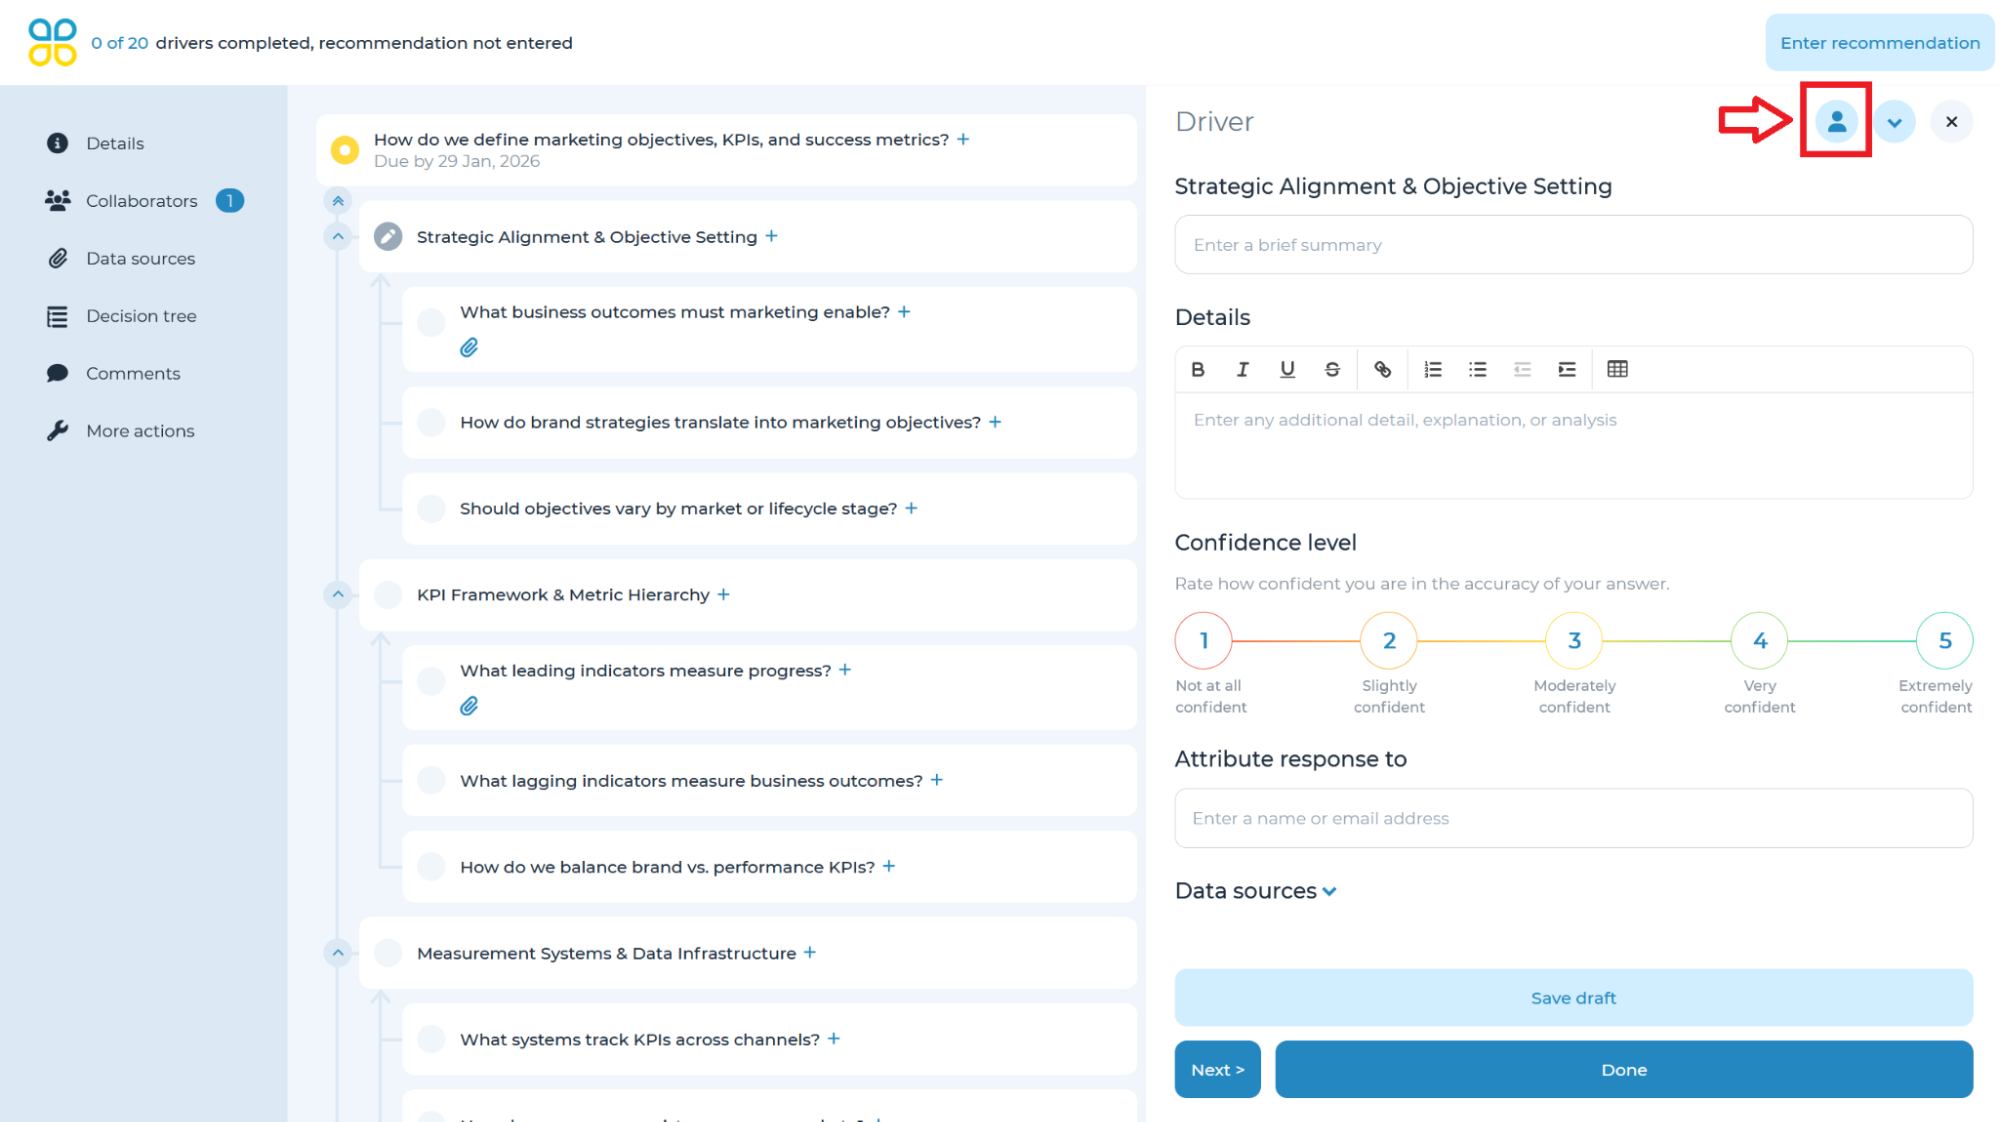
Once a driver is assigned, it will populate in the ‘assigned driver’ section of the decision center for that team member.
To edit decision details, please refer to the ‘edit decision details’ section of the user manual.