
Note: the features detailed in this section of the user guide are available only to users with admin permissions. For more information on permissions, please refer to ‘User types.’
Decision Tree
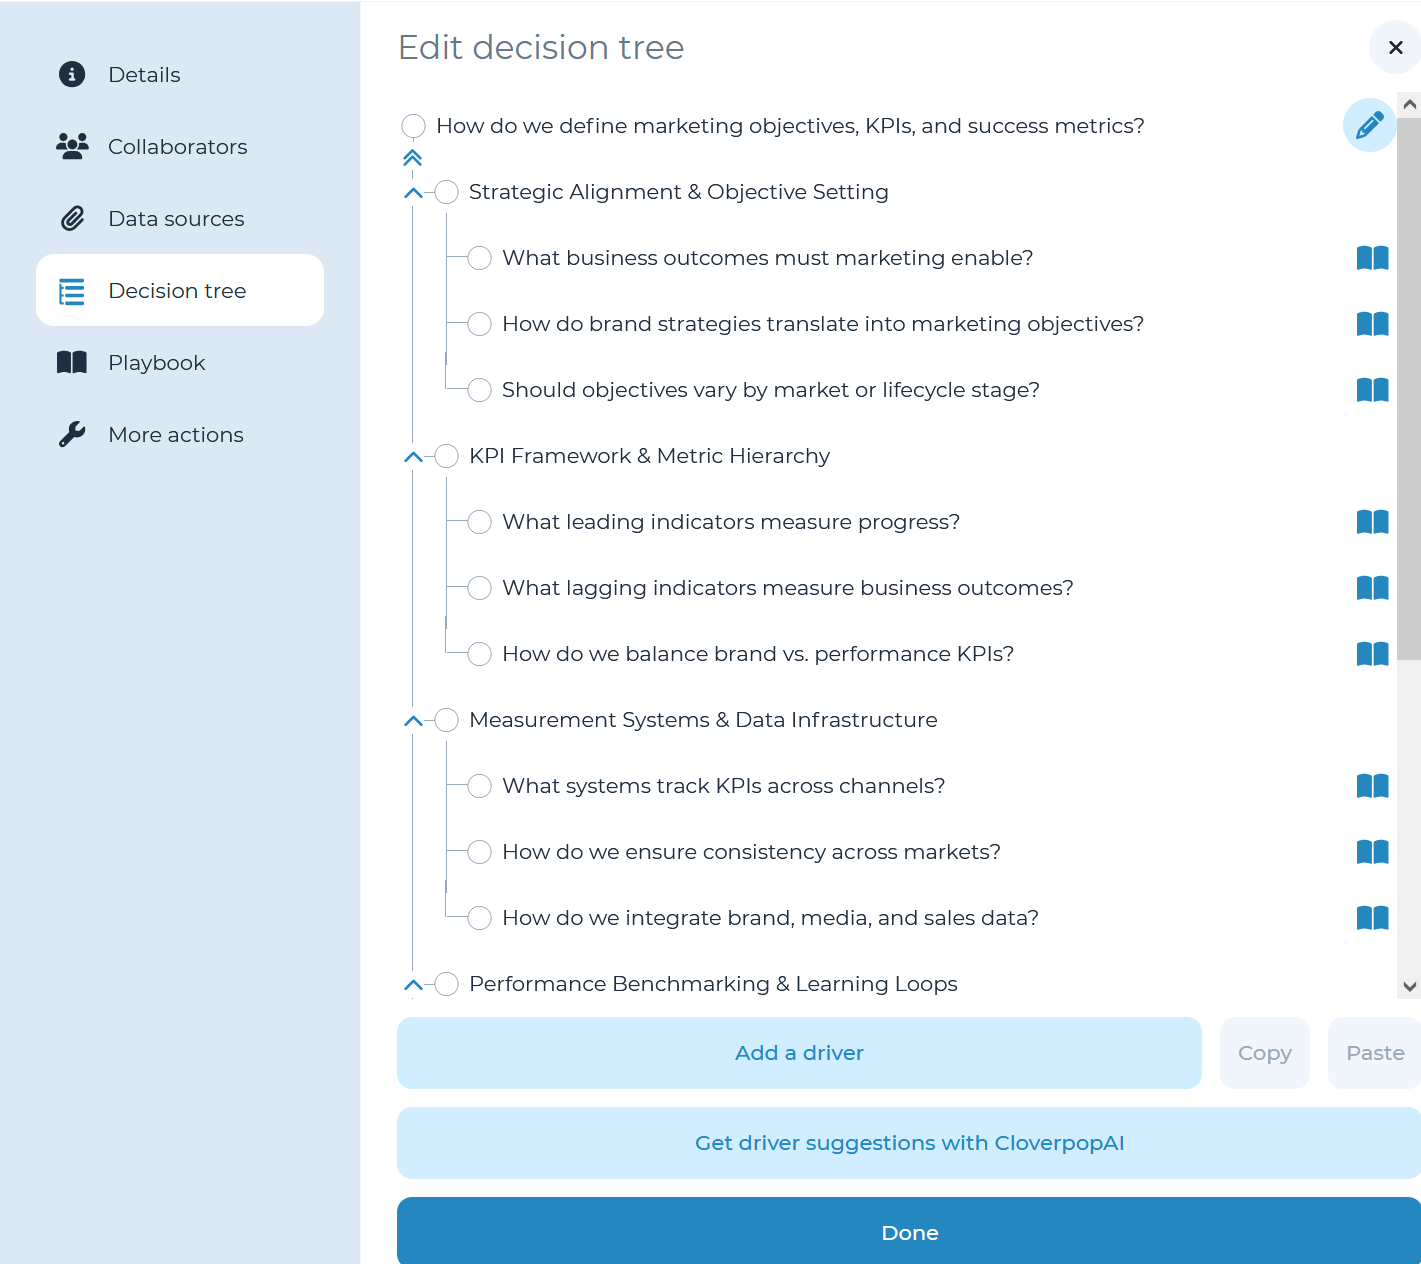
You can adjust the Decision Tree within a template by opening the ‘Decision tree’ panel from the left-hand menu.
Add / delete a driver
Click the ‘Add a driver’ button and enter the necessary details. You can also hover the cursor over the spot in the decision tree where you want to add a driver and click the ‘+’ icon which appears.
Move a driver
You can change the order and level of drivers by dragging and dropping a specific driver or group of drivers.
Edit drivers
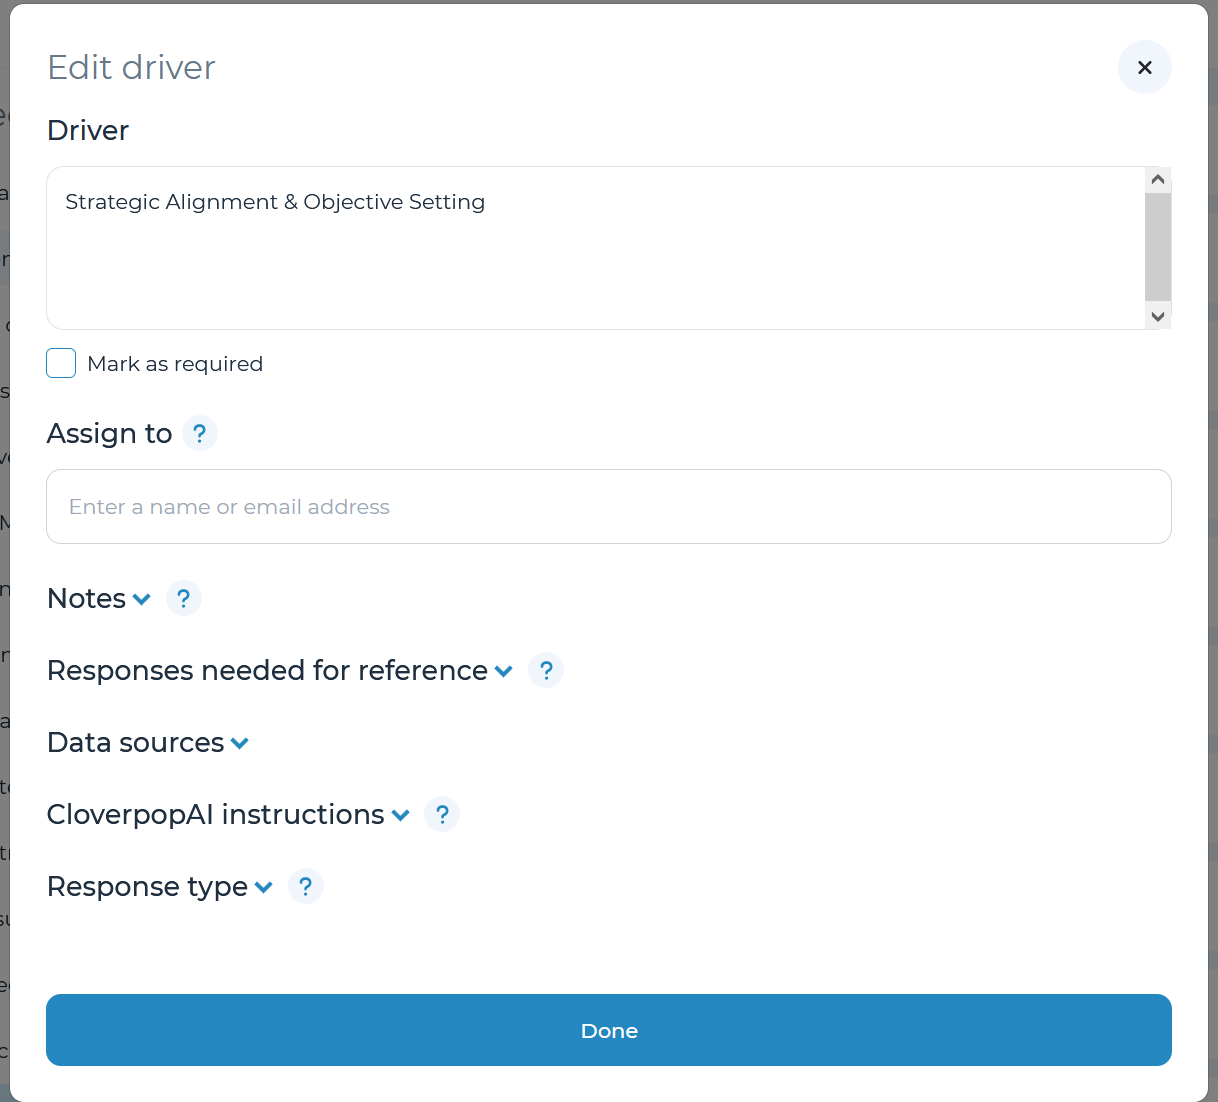
Edit any driver by clicking the Pencil icon. Here, you can edit the following:
- Driver: update the driver question or text.
- Assign to: add an assigned user as a decision template member.
- Notes: instructions for users when they go to answer the specific driver.
- Responses needed for reference: responses to which other drivers one would refer to if they are assigned to this driver.
- Data sources: attach files necessary for the completion of this driver.
- CloverpopAI instructions: additional instructions for CloverpopAI to use when analyzing attached files (for bottom-level drivers) or when analyzing sub-drivers (for not bottom-level drivers). For more information on CloverpopAI, refer to the Summarize drivers and data sources section of the manual.
- Response type: the format of the response to the driver.
After you have sufficiently updated each driver, click ‘Done’ to save your changes.
Copy / paste a driver
Copy / paste a driver by selecting the driver you want to copy, then click ‘Copy’. Select the location you want the driver to be pasted and click ‘Paste’. You can only copy / paste drivers within a specific tree. You cannot copy / paste drivers across multiple trees.
Details
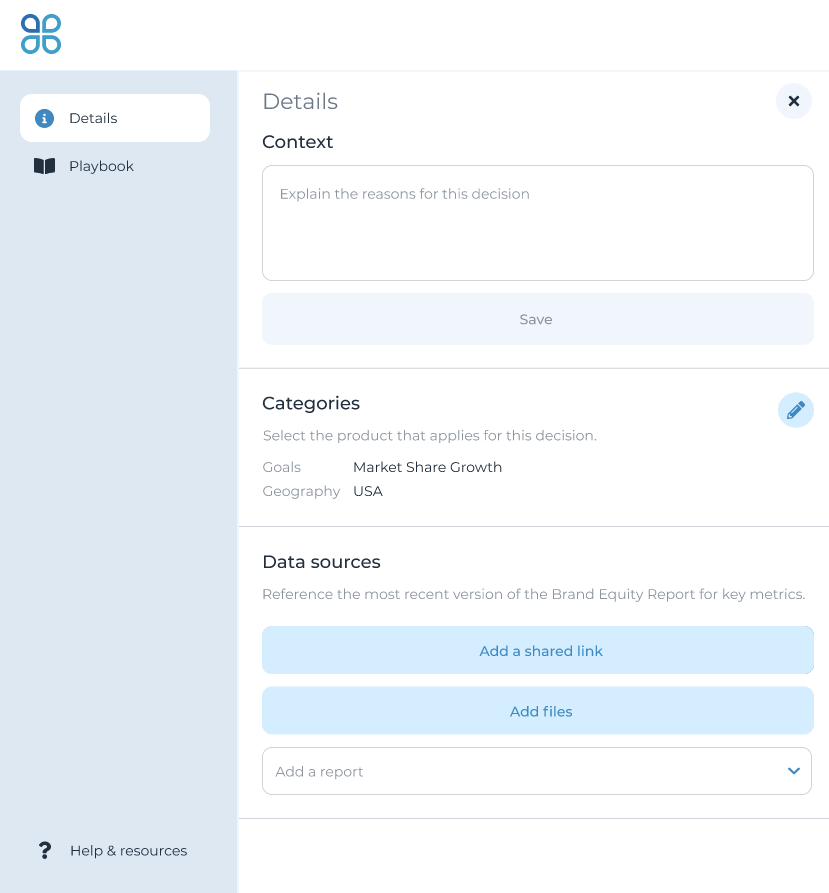
Record the decision context (reason for making the decision) in the Context field.
You may add categories and assign a default value or leave it open to the user. After checking the ‘Required’ box, team members must assign a value to each category when using the template to complete a decision. Enter instructions for the team to assign values for each category using the Categorization notes feature. For more details on how to set categories, refer to Step 3: Decision categorization (template).
You can add template level links and files as Data sources. You may upload files up to 100MB within the platform or link to documents on Google drive.
Refer to the ‘Populate template playbook’ section of the user manual for more details on how to use playbooks to guide team members on submitting decisions.